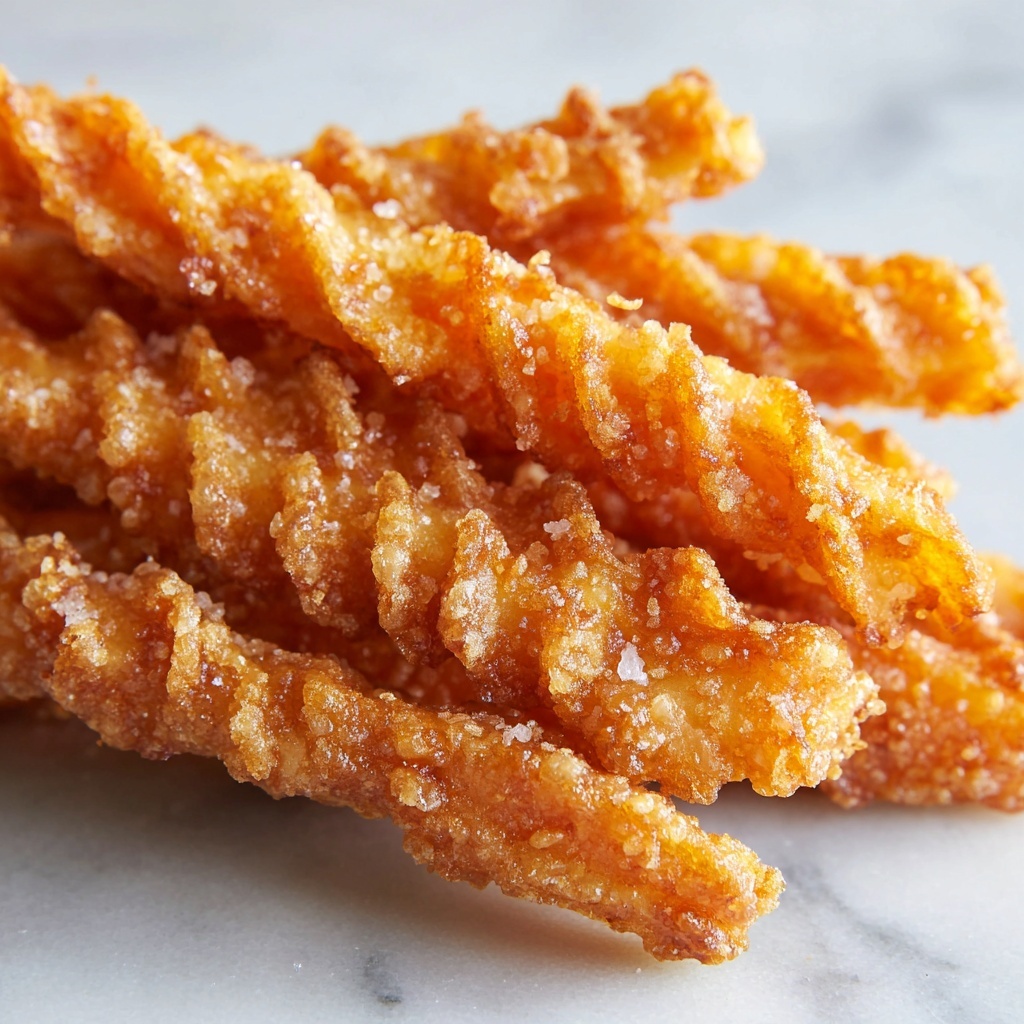
If you are looking for the perfect snack that combines a crispy, buttery texture with a burst of sharp, cheesy goodness, this Cheese Straws Recipe is an absolute must-try. These golden, crunchy straws are incredibly simple to make and offer a delightful balance of flavors with just a hint of spice if you choose to add cayenne pepper. Whether you’re hosting a party, need a quick appetizer, or simply want a homemade treat that’s better than anything store-bought, these cheese straws deliver every time. They are wonderfully addictive and can easily become your go-to recipe for impressing friends and family.
Ingredients You’ll Need
Gathering the right ingredients is the first step to creating perfect cheese straws, and you’ll be amazed at how each simple item plays a crucial role. From the creamy sharpness of the cheddar to the subtle heat of cayenne pepper and the richness of cold butter, these essentials come together to build incredible texture and flavor.
- All-purpose flour: The foundation that provides structure and crispness to the straws.
- Salt: Enhances all the flavors, preventing the cheese from tasting flat.
- Cayenne pepper (optional): Adds a gentle kick, perfect if you want a little spice without overpowering the cheese.
- Sharp cheddar cheese, grated: The star of the recipe, packed with flavor and a touch of tang that defines these straws.
- Unsalted butter, cold and cubed: Creates the flaky, tender texture that makes each bite delightful.
- Cold water: Helps bring the dough together without making it tough.
- Egg (optional for egg wash): Gives the tops a beautiful golden color and slight sheen when baked.
How to Make Cheese Straws Recipe
Step 1: Prepare Your Oven and Baking Sheet
Start by preheating your oven to 375°F (190°C). Prepare a baking sheet by lining it with parchment paper or lightly greasing it to stop your cheese straws from sticking. This little prep step ensures a smooth baking process and an easy cleanup.
Step 2: Mix Dry Ingredients
In a large bowl, combine the all-purpose flour, salt, and cayenne pepper if you want to spice things up. Mixing the dry ingredients first evenly distributes the seasoning, giving each cheese straw a consistent flavor kick.
Step 3: Incorporate the Butter
Add the cold, cubed butter to your flour mix. Use a pastry cutter or your fingers to blend everything until the mixture resembles coarse crumbs. This technique is crucial—those small bits of butter melt during baking, creating layers of flaky buttery texture that are heavenly in every bite.
Step 4: Add the Cheese
Stir in the grated sharp cheddar cheese, making sure it’s evenly distributed. The cheese contributes both flavor and a slight richness to the dough, making the straws irresistibly tasty and satisfying.
Step 5: Form the Dough
Slowly drizzle in cold water, a tablespoon at a time, gently mixing until the dough comes together. It’s important not to overmix as that can toughen the texture. The perfect dough should hold together without being sticky.
Step 6: Roll and Cut
Lightly flour your surface and roll out the dough to about 1/8 inch thickness. Then, use a sharp knife or pizza cutter to slice the dough into strips that are approximately half an inch wide and 3 to 4 inches long—these shapes will bake evenly and become delightfully crisp.
Step 7: Arrange on Baking Sheet and Brush (Optional)
Lay the strips on your prepared baking sheet with space between them so they can crisp up well. If you want a glossy, attractive finish, brush the tops lightly with beaten egg; this adds a lovely golden shine after baking.
Step 8: Bake Until Golden
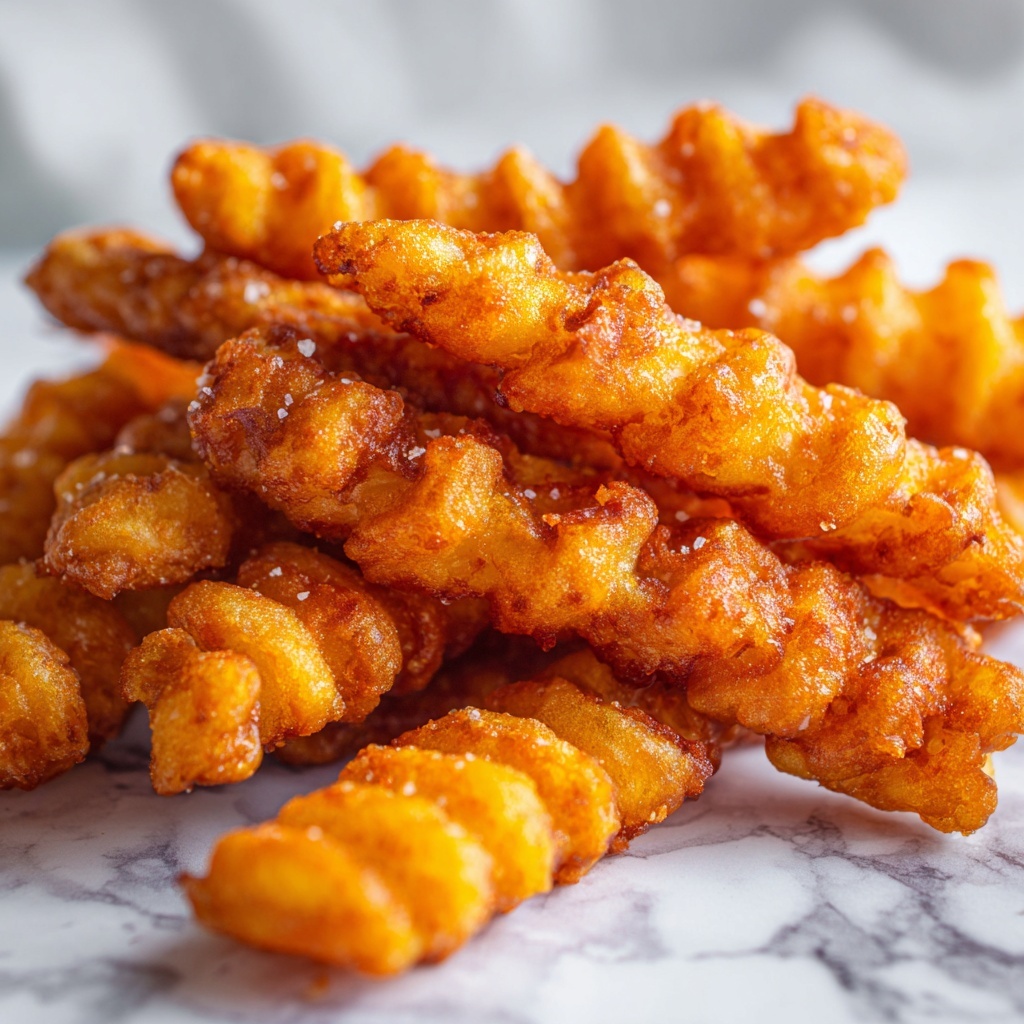
Pop them into the oven for about 12 to 15 minutes. You’ll know they’re ready when the cheese straws turn golden and develop an inviting crispiness. Don’t rush this step—the perfect bake is key to the ultimate crunch.
Step 9: Cool and Enjoy
Once baked, transfer the cheese straws to a wire rack to cool. This helps them stay crisp and lets their flavors settle before you dig in. These are best enjoyed fresh but can be stored for later if needed.
How to Serve Cheese Straws Recipe

Garnishes
Cheese straws are delicious on their own, but a sprinkle of extra grated cheese, a few cracks of black pepper, or a dash of smoked paprika on top before baking can elevate their look and taste. You can also serve with a small dish of tangy mustard or a creamy herb dip for dipping delight.
Side Dishes
Pair cheese straws with fresh salads, chilled soups like gazpacho, or alongside a cheese and charcuterie board. Their crunch and cheesy flavor complement fresh veggies and cured meats brilliantly, making them a versatile side snack or appetizer.
Creative Ways to Present
Wrap a handful of cheese straws in parchment paper tied with twine for rustic party favors or nestle them upright in a stylish glass for an eye-catching breadstick substitute. You can also weave a few into a savory cheese straw bouquet as a centerpiece for your next gathering.
Make Ahead and Storage
Storing Leftovers
If you happen to have leftovers, store the cheese straws in an airtight container at room temperature. This keeps them crisp for up to 3 days, perfect if you want a quick snack later on.
Freezing
You can freeze unbaked cheese straws by placing them on a baking sheet and freezing until firm, then transferring to a freezer bag. Bake directly from frozen, adding a few extra minutes to the baking time. This method keeps your dough fresh and ready for any last-minute cravings.
Reheating
To revive stored or frozen cheese straws, pop them in a preheated oven at 350°F (175°C) for 5 to 7 minutes. This refreshes their crispness beautifully, making them taste freshly baked all over again.
FAQs
Can I use a different type of cheese for this Cheese Straws Recipe?
Absolutely! While sharp cheddar is traditional and offers great flavor, you can experiment with cheeses like Parmesan, Gruyère, or even a spicy pepper jack for different twists. Just make sure your cheese is grated finely for best results.
Is it necessary to add cayenne pepper?
No, the cayenne pepper is completely optional. It adds a subtle heat that balances the richness of the cheese, but if you prefer a classic, straightforward cheese straw, feel free to leave it out.
Can I make the dough ahead of time?
Yes, the dough can be prepared a day in advance and stored wrapped tightly in the refrigerator. This can actually help develop flavors further. Just let it come to room temperature before rolling and cutting.
What makes these cheese straws crisp?
The key to crispness is cold butter cut into coarse crumbs and rolling the dough thinly before baking at the right temperature. These factors create a flaky texture that’s just irresistible.
Are cheese straws gluten-free?
This recipe uses all-purpose flour, so it is not gluten-free. However, you can try substituting with a gluten-free flour blend, keeping in mind the texture may vary slightly.
Final Thoughts
This Cheese Straws Recipe is a wonderful blend of simplicity and bold flavor that will become a beloved classic in your kitchen. Once you taste these crisp, cheesy bites, you’ll understand why they’re a favorite at gatherings and perfect for casual snacking. Don’t hesitate to try making them—you’ll find the process just as enjoyable as the delicious result. Happy baking and even happier snacking!
Print
Cheese Straws Recipe
- Prep Time: 15 minutes
- Cook Time: 15 minutes
- Total Time: 30 minutes
- Yield: 24 servings
- Category: Snack
- Method: Baking
- Cuisine: American
- Diet: Vegetarian
Description
These crispy and cheesy straws are a delightful snack or appetizer perfect for any occasion. Made with sharp cheddar cheese and a hint of cayenne pepper for optional spice, they are easy to prepare and bake to golden perfection, delivering a savory crunch in every bite.
Ingredients
Dry Ingredients
- 2 cups all-purpose flour
- 1/4 teaspoon salt
- 1/4 teaspoon cayenne pepper (optional, for a spicy kick)
Wet Ingredients
- 1 cup sharp cheddar cheese, grated
- 1/2 cup unsalted butter, cold and cut into cubes
- 1/4 cup cold water (or as needed)
- 1 egg (for egg wash, optional)
Instructions
- Preheat Oven: Preheat your oven to 375°F (190°C). Line a baking sheet with parchment paper or lightly grease it to prevent sticking.
- Mix Dry Ingredients: In a large mixing bowl, combine the all-purpose flour, salt, and cayenne pepper if you want a bit of heat in your cheese straws.
- Incorporate Butter: Add the cold, cubed unsalted butter to the flour mixture. Using a pastry cutter or your hands, blend the butter into the flour until the mixture resembles coarse crumbs, ensuring a flaky texture.
- Add Cheese: Stir in the grated sharp cheddar cheese thoroughly so it is evenly mixed throughout the flour and butter mixture.
- Add Water and Form Dough: Slowly drizzle in the cold water, one tablespoon at a time, mixing gently with your hands or a spoon until the dough just comes together. Avoid overworking the dough to keep it tender.
- Roll and Cut Dough: On a lightly floured surface, roll out the dough to about 1/8 inch thickness. Using a sharp knife or pizza cutter, slice the dough into strips approximately 1/2 inch wide and 3-4 inches long.
- Prepare for Baking: Arrange the dough strips on the prepared baking sheet, spacing them apart so they do not touch while baking.
- Optional Egg Wash: If desired, brush the tops of the straws with a beaten egg to give them a beautiful golden color and glossy finish once baked.
- Bake: Place the baking sheet in the preheated oven and bake for 12 to 15 minutes, or until the cheese straws turn golden brown and crisp.
- Cool and Serve: Remove the cheese straws from the oven and transfer them to a wire rack to cool completely. Serve them as a tasty snack or appetizer.
Notes
- Use cold butter and water to ensure flaky and tender cheese straws.
- The cayenne pepper is optional but adds a nice spicy kick if desired.
- Egg wash is optional but recommended for a golden, attractive finish.
- Don’t overwork the dough to avoid tough cheese straws.
- Store leftover cheese straws in an airtight container at room temperature for up to 3 days.


