
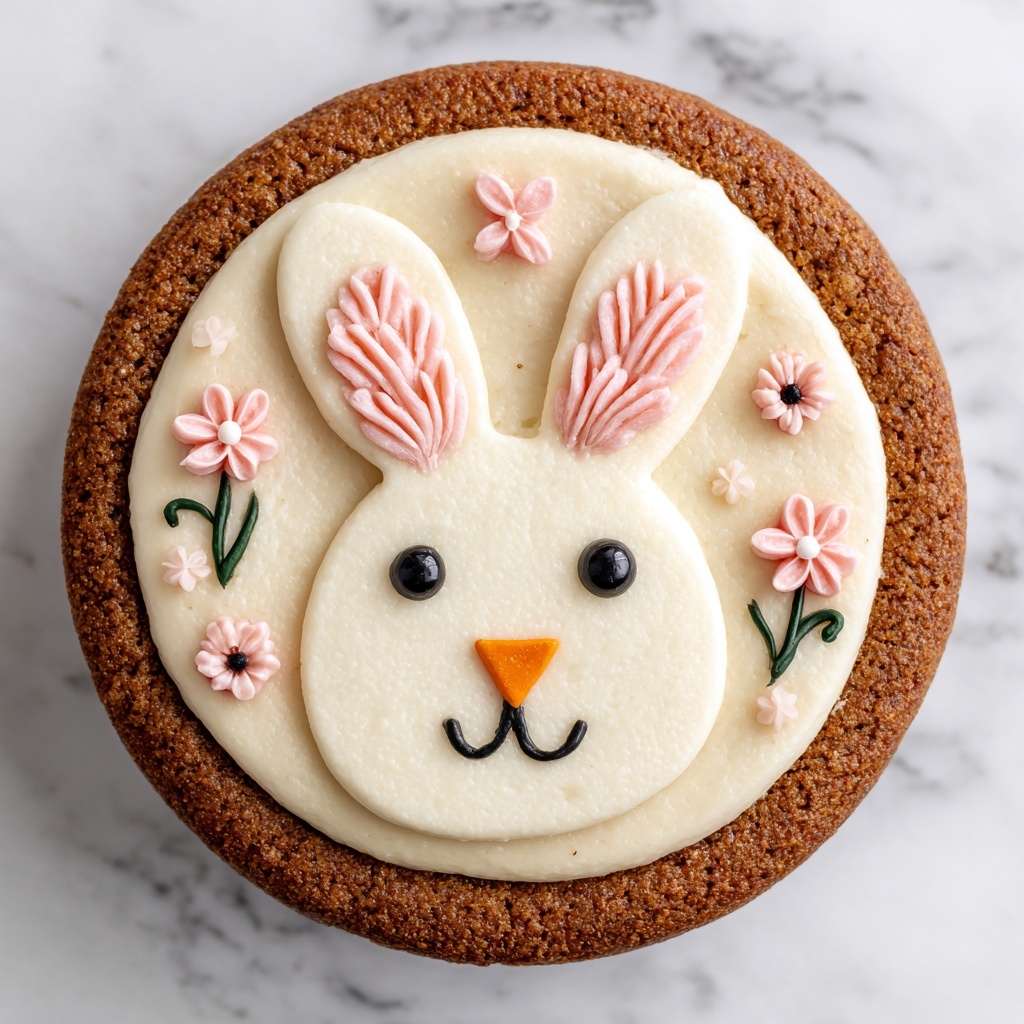
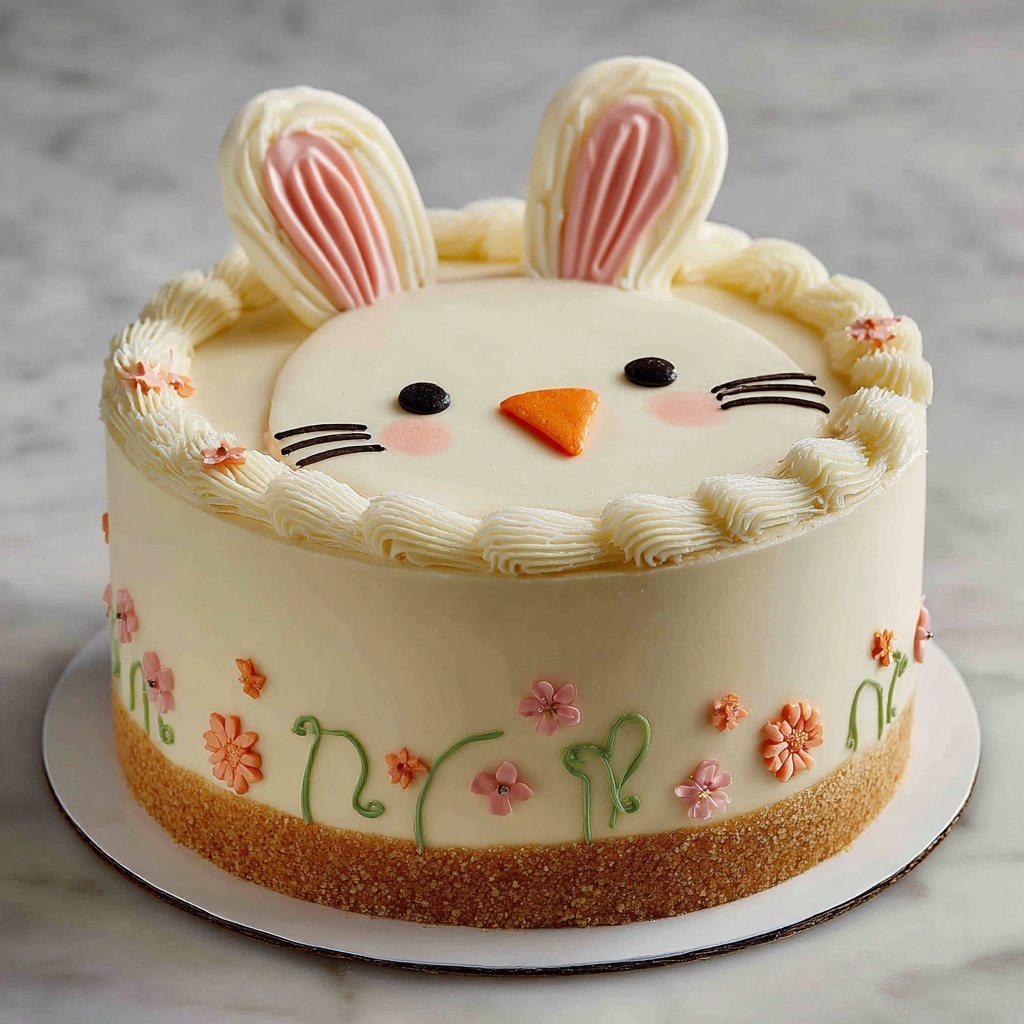
If you’re looking for a delightful centerpiece that will charm everyone at your Easter celebration, then this Easter Bunny Cake Recipe is exactly what you need. This whimsical cake brings together fluffy layers of buttery cake with a dreamy vanilla frosting, textured with shredded coconut to create adorable bunny fur. From its pink candy nose to colorful jelly bean eyes, every detail of this cake screams festive fun and homemade love. Whether it’s your first time crafting a themed cake or you’re a seasoned baker aiming to impress, this Easter Bunny Cake Recipe will make your holiday extra special and memorable.
Ingredients You’ll Need
The beauty of this Easter Bunny Cake Recipe lies in its simple yet essential ingredients that come together to create rich flavor and perfect texture. Each component plays a vital role, whether it’s the butter adding moistness, the eggs lending structure, or the vanilla extract bringing aromatic sweetness.
- 2 cups all-purpose flour: Provides the perfect base structure to keep the cake tender yet firm enough to hold the bunny shape.
- 2 cups granulated sugar: Sweetens the batter evenly, balancing the richness of the butter.
- 1 cup unsalted butter, softened: Adds richness and moisture to the cake, essential for that melt-in-your-mouth crumb.
- 4 large eggs: Act as important binding agents while adding fluffiness to each bite.
- 1 cup whole milk: Keeps the batter smooth and moist while helping activate the baking powder.
- 2 teaspoons baking powder: Works its magic to give you that handsomely risen cake height and light texture.
- ½ teaspoon salt: Enhances the sweetness and balances flavors for a more rounded taste.
- 2 teaspoons vanilla extract: Infuses each layer with warm, inviting flavor that makes every bite comforting.
- 4 cups powdered sugar: Essential for a thick, creamy frosting that sticks beautifully to the cake.
- 2 tablespoons heavy cream: Helps achieve the perfect frosting consistency, smooth and fluffy enough for piping and coating.
- Pink food coloring: Adds just the right pop of color for the bunny’s adorable nose.
- Green food coloring (optional): Perfect for creating a grassy cake board that frames your bunny like a spring meadow.
- Shredded coconut: Used to create the texture of fluffy bunny fur, giving it a playful, tactile finish.
- Jelly beans or candy: Serve as vibrant eyes and nose, making your bunny come alive with personality.
How to Make Easter Bunny Cake Recipe
Step 1: Prepare the Cake Batter
Begin by preheating your oven to 350°F (175°C) and greasing two 9-inch round cake pans. Cream the softened butter and sugar together until light and fluffy—the key to a soft cake texture. Incorporate eggs one at a time to build structure and flavor smoothly.
Step 2: Combine Dry Ingredients and Alternate Mixing
Whisk together flour, baking powder, and salt in a separate bowl. Gradually add these dry ingredients into your wet butter and egg mixture, alternating with milk. This technique ensures the batter blends evenly without overmixing, keeping your cake tender and light.
Step 3: Bake and Cool the Cake Layers
Pour the batter evenly into your pans and bake for about 30-35 minutes. Testing with a toothpick is a baker’s best friend here—when it comes out clean, your cakes are ready. Let them cool in pans briefly to avoid breaking, then transfer to wire racks to cool completely.
Step 4: Whip Up the Vanilla Frosting
Beat the softened butter smoothly before gradually adding powdered sugar for a silky, sweet base. Vanilla extract and heavy cream join the party next, making the frosting luxuriously fluffy and the perfect spreadable texture for your bunny’s coat.
Step 5: Shape the Bunny
Once cooled, cut one cake in half to form bunny ears. Arrange the full round as the face and the two halves perched atop as ears, securing with frosting for steady assembly. This shaping trick turns simple round cakes into a charming bunny silhouette.
Step 6: Decorate to Complete Your Easter Bunny Cake Recipe
Cover the entire bunny with a thick layer of white frosting, then press shredded coconut gently into the frosting to mimic fluffy fur. A little tinted pink frosting forms a cute nose, while jelly beans or candies become cheerful eyes. Finish off with a frosting-piped smile and whiskers to bring your bunny’s personality to life. Optionally, add green food coloring to the cake board for a fresh grassy effect.
How to Serve Easter Bunny Cake Recipe
Garnishes
Adding extra garnishes like pastel-colored jelly beans or edible flowers around your bunny cake can elevate its festive charm. Consider some fresh mint sprigs or small candy carrots for delightful visual appeal and a hint of extra flavor on the side.
Side Dishes
Pair this Easter Bunny Cake with light sides such as fresh fruit salad or a dollop of whipped cream to balance the sweetness. A refreshing cup of tea or a fruity punch also complements the cake, making your Easter gathering even more special.
Creative Ways to Present
Try placing your bunny cake on a decorated platter filled with pastel-colored shredded paper or edible grass to create a vibrant Easter nest. Surround the cake with small chocolate eggs or candies for a playful, interactive dessert table centerpiece that invites smiles and conversation.
Make Ahead and Storage
Storing Leftovers
To keep your leftover Easter Bunny Cake fresh, cover it lightly with plastic wrap or store in an airtight container in the refrigerator. This helps retain moisture and flavor for up to 3 days without drying out the delicate frosting and coconut fur.
Freezing
If you want to save your Easter Bunny Cake Recipe for later, wrap the cake tightly in plastic wrap and then foil before freezing. This locks in freshness for up to 2 months. Thaw in the refrigerator overnight before serving to maintain the best texture.
Reheating
Since this cake has a lot of frosting, reheating isn’t generally recommended. However, if you want to enjoy a slightly warmed slice, remove any frosting parts and microwave only the cake section in short 10-second bursts to avoid melting the frosting or drying out the cake.
FAQs
Can I use a different flavor of cake for this Easter Bunny Cake Recipe?
Absolutely! While the classic vanilla butter cake is delightful, you can experiment with carrot cake or chocolate for a unique twist. Just be sure the cake remains sturdy enough to hold the bunny shape.
How do I prevent the shredded coconut from falling off the frosting?
Press the coconut gently but firmly into the frosting right after spreading it, while the frosting is still soft and sticky. This helps it adhere better and keeps the ‘fur’ looking fluffy without too much shedding.
What alternatives can I use for the jelly bean eyes and nose?
Small chocolate chips, raisins, or candy-coated chocolate pieces work wonderfully as eyes and noses if you want a different look or have allergy considerations. Just place them firmly while the frosting is still tacky.
Is this Easter Bunny Cake Recipe suitable for kids to help make?
Definitely! Kids love the assembly and decorating parts since they get to create the bunny’s face and ears. Just handle the baking part yourself, and then have fun together adding frosting and decorations.
Can I make this cake gluten-free?
Yes, by substituting the all-purpose flour with a gluten-free baking blend and ensuring your baking powder is gluten-free, you can adapt this Easter Bunny Cake Recipe for gluten-sensitive guests without sacrificing taste or texture.
Final Thoughts
This Easter Bunny Cake Recipe is a joyful way to bring some extra charm and sweetness to your holiday table. It’s approachable enough for bakers of all skill levels and makes for a playful centerpiece that everyone will adore. So, grab your ingredients and get ready to create an unforgettable Easter treat that’s as fun to make as it is to eat!
Print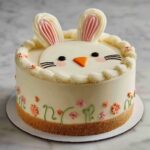
Easter Bunny Cake Recipe
- Prep Time: 20 minutes
- Cook Time: 35 minutes
- Total Time: 55 minutes
- Yield: 10 servings
- Category: Dessert
- Method: Baking
- Cuisine: American
Description
This delightful Easter Bunny Cake is a perfectly moist and fluffy vanilla cake shaped and decorated to resemble an adorable bunny, making it a festive centerpiece for your Easter celebration. Featuring a classic vanilla flavor with smooth buttercream frosting and textured shredded coconut fur, this cake is both fun to make and delicious to eat, guaranteed to bring smiles to both kids and adults alike.
Ingredients
For the Cake:
- 2 cups all-purpose flour
- 2 cups granulated sugar
- 1 cup unsalted butter, softened
- 4 large eggs
- 1 cup whole milk
- 2 teaspoons baking powder
- 1/2 teaspoon salt
- 2 teaspoons vanilla extract
For the Frosting and Decoration:
- 1 cup unsalted butter, softened
- 4 cups powdered sugar
- 2 teaspoons vanilla extract
- 2 tablespoons heavy cream (more if needed for desired consistency)
- Pink food coloring (for the bunny’s nose)
- Green food coloring (optional, for decorating the cake board)
- Shredded coconut (for bunny’s fur)
- Jelly beans or candy for eyes and nose
Instructions
- Prepare the Cake: Preheat your oven to 350°F (175°C) and grease and flour two 9-inch round cake pans to prevent sticking.
- Cream Butter and Sugar: In a large mixing bowl, beat the softened butter and sugar together until the mixture is light and fluffy, which helps create a tender cake texture.
- Add Eggs: Incorporate the eggs one at a time, mixing thoroughly after adding each to ensure even distribution and proper emulsification.
- Mix Dry Ingredients: In a separate bowl, sift together the all-purpose flour, baking powder, and salt to combine and aerate these ingredients.
- Combine Wet and Dry Ingredients: Gradually add the dry ingredient mix to the wet ingredients in batches, alternating with the milk. Start and finish with the dry ingredients, and mix just until combined to avoid overworking the batter.
- Add Vanilla Extract: Stir in the vanilla extract to infuse the batter with a warm, sweet aroma and flavor.
- Bake the Cake: Pour the batter evenly into the prepared pans. Bake for 30-35 minutes or until a toothpick inserted into the center comes out clean, indicating the cake is fully baked.
- Cool the Cakes: Let the cakes cool in the pans for 10 minutes to firm up, then transfer them onto wire racks to cool completely to room temperature, which is important before frosting.
- Make the Frosting: Beat the softened butter in a large bowl until smooth. Gradually incorporate the powdered sugar, adding one cup at a time and mixing well between additions for a silky texture.
- Add Flavor and Cream: Mix in the vanilla extract and heavy cream, continuing to beat the frosting until it is light and fluffy. Add more cream if needed to achieve a spreadable consistency.
- Shape the Bunny: Once the cakes are fully cool, slice one of the 9-inch round cakes in half to form two ‘ears.’ Place the whole cake on a serving platter as the bunny’s face, then position the two halves on top as ears, securing them with frosting if needed.
- Frost the Cake: Apply a generous layer of white frosting to the entire cake, covering the main round and the ear pieces to create a seamless base for decorating.
- Add Shredded Coconut: Press shredded coconut over the frosted surface to mimic the texture of bunny fur, giving the cake a fluffy, tactile appearance.
- Decorate the Face: Tint a small portion of frosting with pink food coloring and pipe a cute nose on the bunny’s face. Use jelly beans or candies to make the eyes and a nose, or opt for small chocolate chips for a realistic look.
- Detail the Face: Pipe a smile and whiskers using additional frosting to bring the bunny’s expression to life.
- Optional Decoration: Tint the cake board green with food coloring to resemble grass and complete the festive Easter look.
- Serve: Your Easter Bunny Cake is now ready to serve. Enjoy this charming and delicious cake as the highlight of your holiday celebration.
Notes
- Ensure the cakes are completely cooled before frosting to prevent melting and sliding.
- If the frosting is too thick, add more heavy cream a teaspoon at a time until spreadable.
- Use fresh shredded coconut for best texture and flavor.
- You can substitute jelly beans with chocolate chips or edible candy eyes for decoration.
- Toasting the shredded coconut slightly will add a nutty flavor and deeper color if desired.
- For a gluten-free version, substitute all-purpose flour with a gluten-free blend in the same quantity.
