
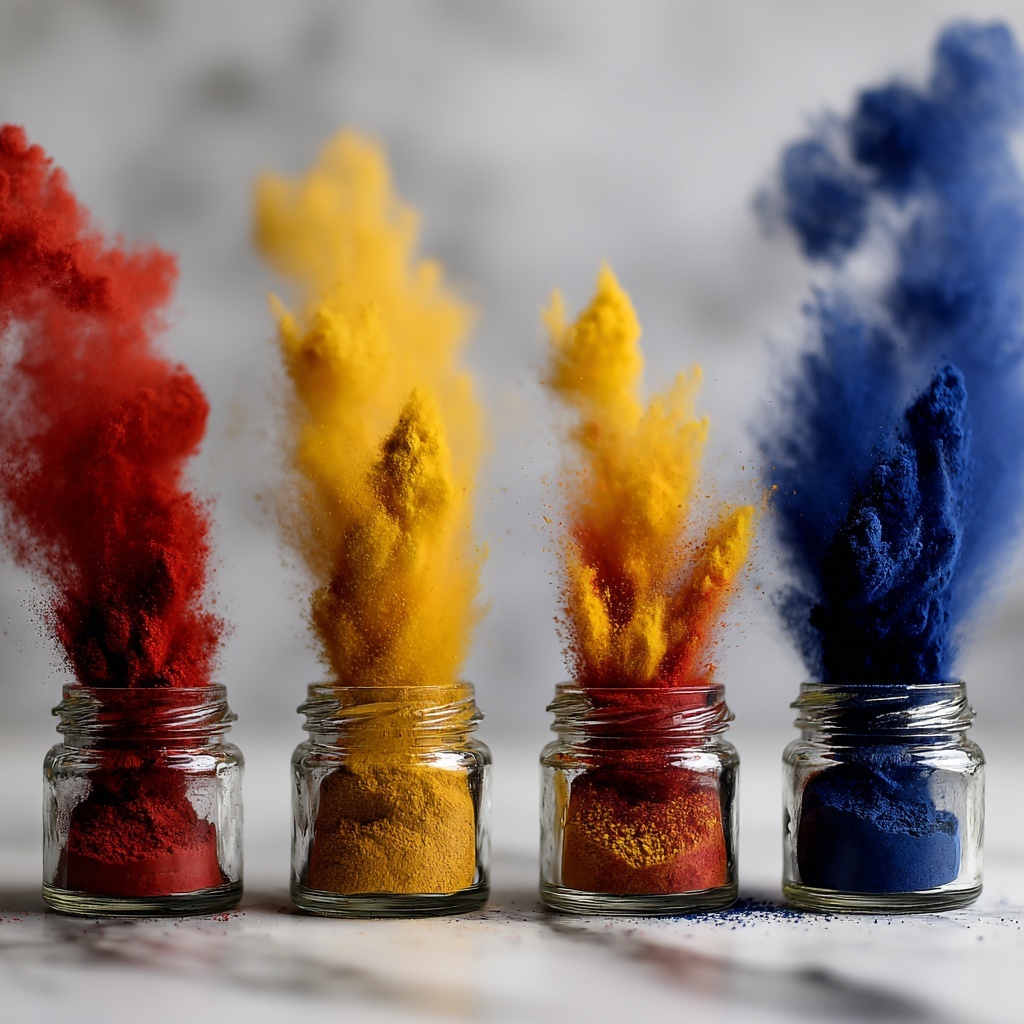
If you’re looking for an incredibly fun and educational way to wow your friends or entertain the kids, the Exploding Pop Rockets: Unleash Fun with Science! Recipe is exactly what you need. This simple yet thrilling experiment combines chemistry and play in a way that literally launches excitement into the air. With just a few everyday ingredients and basic supplies, you get to witness colorful, sparkling rockets popping off and soaring skyward, making science feel like pure magic. Trust me, once you try this recipe, it becomes a go-to for memorable outdoor adventures and learning moments.
Ingredients You’ll Need
The magic behind the Exploding Pop Rockets: Unleash Fun with Science! Recipe is in its simplicity. Each ingredient plays a crucial role, whether it’s creating the fizzy reaction, adding bursts of color, or ensuring safety and ease of use. Here’s everything you’ll need to prepare your own mini rocket launch:
- 6 empty 35 mm film canisters with tight-fitting lids: These are perfect for creating a sealed environment that builds pressure before the big launch.
- 1 box baking soda or Alka-Seltzer tablets: The reactive agent that combines with vinegar to generate gas and propel your rockets.
- Vinegar (white or apple cider): Acts as the acid that triggers the fizzing chemical reaction with baking soda or Alka-Seltzer.
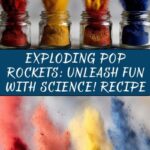
- Optional food coloring: Adds vibrant color to the eruption, making each pop spectacular and visually exciting.
- Optional fine glitter: Creates sparkling trails that follow your rockets for extra flair and fun.
- Funnel or small spoon: Helpful tools to get the ingredients into the canisters without spills.
- Safety goggles: Essential for protecting eyes from unexpected splashes and to keep the experiment safe.
- Outdoor space for launching: Because your rockets need plenty of room to pop and soar safely.
How to Make Exploding Pop Rockets: Unleash Fun with Science! Recipe
Step 1: Prepare Your Launch Zone
Safety first! Put on your safety goggles and head outside to a spacious spot where your rockets have room to fly without any obstacles or fragile items nearby. This step sets the stage for a fun, safe, and mess-free experience.
Step 2: Fill the Canisters
Measure about one third of the canister full of vinegar. This quantity is just right to build enough pressure for a strong pop without overflowing. Adding precise amounts helps control the launch’s power and makes repeated attempts just as thrilling.
Step 3: Add Color and Sparkle
Drop 2 to 3 drops of your chosen food coloring and a tiny pinch of fine glitter into the vinegar. This step transforms the chemical reaction into a dazzling, visual spectacle, turning each rocket into a vibrant, sparkling mini show.
Step 4: Prepare the Baking Soda Packet
If you’re using baking soda, spoon 1 teaspoon onto a small square of tissue and twist it closed tightly to create a delayed reaction packet. This allows the baking soda to start reacting once sealed inside the canister, giving you a moment to quickly cap and set it down before liftoff.
Step 5: Launch Your Rocket
Drop your baking soda packet into the canister or add half an Alka-Seltzer tablet if you prefer that option. Snap the lid on as tightly as possible and immediately place the canister lid-side down on the ground. Step back swiftly at least six feet to stay safe and enjoy the exciting build-up.
Step 6: Watch the Explosion!
Wait patiently as the pressure inside builds until POP! Your Exploding Pop Rockets: Unleash Fun with Science! Recipe sends each tiny rocket blasting into the air with a burst of fizz and sparkle that’s as satisfying as it is exciting. Repeat for endless launches and laughs.
How to Serve Exploding Pop Rockets: Unleash Fun with Science! Recipe

Garnishes
While garnishes might sound fancy for a science experiment, adding food coloring and glitter is the perfect “garnish” here. They make each eruption uniquely colorful and magical. You can even try glow-in-the-dark powders or edible confetti for added surprises!
Side Dishes
The best part about this recipe is that it’s often the main event, but pairing your launch party with easy snacks like popcorn, fruit juice, or lemonade encourages a festive atmosphere around your outdoor demonstrations. Just keep refreshments nearby for quick energy boosts between launches.
Creative Ways to Present
Try lining up your canisters on a painted cardboard “launch pad” or use numbered cones to create a countdown effect. Incorporating themed decorations like stars or planets can elevate the fun, especially if your audience loves space or science themes. Take photos or videos to capture those priceless moments of tiny rockets flying sky high.
Make Ahead and Storage
Storing Leftovers
Because these rockets are best fresh for the explosive effect, ingredients like vinegar and baking soda should be stored separately in airtight containers. Keep leftover vinegar in a cool place and baking soda tightly sealed to maintain potency for your next batch of thrilling launches.
Freezing
Freezing is not recommended for this project since the reaction depends on the freshness of the ingredients and their temperature. Cold compounds tend to react slower or less vigorously, which can lead to disappointing launches.
Reheating
Since this is a chemical reaction experiment, reheating does not apply. Always use fresh ingredients at room temperature for the best, most dependable pops and rocket flights.
FAQs
Can I use regular plastic containers instead of film canisters?
Film canisters or similar small containers with tight-fitting lids work best because they can hold pressure until the pop launch. Regular plastic containers often have loose lids or are too large, which might not build enough pressure for a successful rocket flight.
Is this safe for kids to do alone?
While this activity is fantastic for kids, adult supervision is highly recommended to ensure safety, especially with snapping lids and pressure buildup. Safety goggles and outdoor space reduce risks significantly.
Can I make the rockets explode indoors?
It’s best to perform this experiment outdoors due to the vinegar-smell, spills, and flying containers. Indoors could also damage furniture or cause injuries if the containers launch unpredictably.
Why won’t my rocket pop or fly?
Common reasons include not sealing the lid tightly, incorrect vinegar-to-baking-soda ratios, or damp baking soda which won’t react well. Make sure lids snap securely and ingredients are fresh and dry for the best launches.
Can I reuse the film canisters?
Yes! Just rinse and dry them thoroughly after each launch. This not only saves resources but allows quick preparation for your next round of Exploding Pop Rockets: Unleash Fun with Science! Recipe fun.
Final Thoughts
This Exploding Pop Rockets: Unleash Fun with Science! Recipe invites anyone to embrace the joy of discovery and excitement through hands-on science fun. It’s perfect for family afternoons, classroom demonstrations, or any day when you want to add a little sparkle and pop to your learning. So gather your ingredients, step outside, and get ready to launch some smiles with this unforgettable experience!
Print
Exploding Pop Rockets: Unleash Fun with Science! Recipe
- Prep Time: 10 minutes
- Cook Time: 5 minutes per launch reaction
- Total Time: 1 hour (for multiple launches and setup)
- Yield: 6 launches
- Category: Science Experiment
- Method: No-Cook
- Cuisine: None
Description
Exploding Pop Rockets is a fun and educational science activity that combines simple household ingredients to create colorful, fizzy rocket launches. Using film canisters or small condiment cups, this hands-on experiment demonstrates chemical reactions and gas buildup, making it an exciting outdoor activity for kids and adults alike.
Ingredients
Materials
- 6 empty 35 mm film canisters with tight-fitting lids (or mini condiment cups with snap lids)
- 1 box baking soda OR Alka-Seltzer tablets
- Vinegar (white or apple cider)
- Optional: food coloring (a few drops for colorful eruptions)
- Optional: fine glitter (a pinch for sparkle trails)
- Funnel or small spoon
- Safety goggles
Instructions
- Prepare Safety Equipment and Launch Area: Put on safety goggles to protect your eyes, and choose an outdoor space with plenty of open room for launching the rockets safely.
- Fill Canister with Vinegar: Pour vinegar into each film canister until it is approximately one-third full.
- Add Color and Sparkle (Optional): Add 2 to 3 drops of food coloring and a pinch of fine glitter into the vinegar for a visually exciting eruption.
- Prepare Baking Soda Packet: If using baking soda, place 1 teaspoon into a small piece of tissue paper and twist it closed to form a time-delay packet that will dissolve slowly once inside the vinegar.
- Add Reaction Agent and Seal: Quickly drop the baking soda packet into the canister or add half an Alka-Seltzer tablet, then snap the lid on tightly to trap the gas generated.
- Launch the Rocket: Immediately flip the canister upside down with the lid on the ground, then step back at least 6 feet to a safe distance.
- Watch the Reaction: Wait as pressure builds inside the canister until it pops, launching the canister upwards like a rocket.
- Repeat: Use fresh ingredients and repeat the process for multiple exciting launches.
Notes
- Always wear safety goggles to protect your eyes during launches.
- Perform the experiment outdoors or in a well-ventilated area to avoid mess and ensure safety.
- Use tissue packets to delay the reaction for a stronger launch.
- Do not stand too close to the canister when launching to prevent injury.
- Adult supervision is recommended for children during the experiment.


