
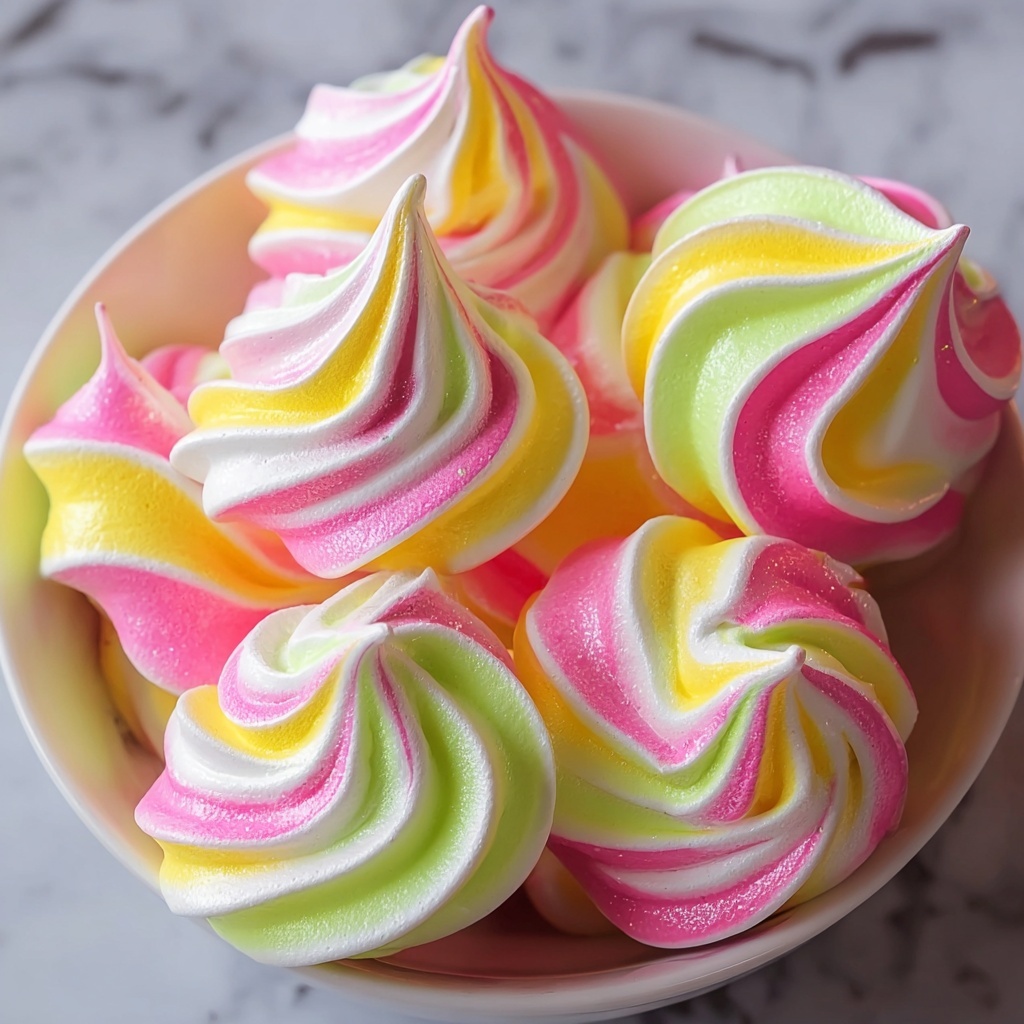
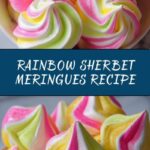
If you’re looking for a delightful treat that bursts with color and whimsy, this Rainbow Sherbet Meringues Recipe is going to become your new favorite. These airy, crisp meringues capture the playful essence of classic sherbet flavors, transformed into charming little swirls of pink, orange, and green that melt in your mouth. Perfect for parties, summer gatherings, or just brightening up an ordinary day, this recipe is as fun to make as it is to eat. Whether you’re a novice baker or a seasoned pro, you’ll love how these bite-sized clouds bring a splash of rainbow magic to your table.
Ingredients You’ll Need
Trust me, the ingredients for this Rainbow Sherbet Meringues Recipe are super simple but absolutely crucial to get that perfect lightness, vibrant color, and sherbet-inspired flavor. Each item plays a starring role from texture to taste to that eye-catching look.
- 4 large egg whites at room temperature: Essential for creating the airy foundation of the meringues, room temperature whites whip up better and faster.
- 1 cup granulated sugar: Adds the sweet crunch and glossy finish essential for meringue texture.
- 1/4 teaspoon cream of tartar: Stabilizes the egg whites and helps achieve those stiff peaks.
- 1/2 teaspoon pure vanilla extract: Brings a warm, comforting flavor backdrop.
- 1/2 teaspoon lemon extract: Adds a zingy brightness reminiscent of sherbet’s tangy notes.
- Gel food coloring in pink, orange, and green: Gives the meringues their vibrant sherbet-inspired hues without altering texture.
- 2 tablespoons rainbow sanding sugar or sprinkles for garnish: Optional but adds a delightful sparkle and extra sweetness on top.
How to Make Rainbow Sherbet Meringues Recipe
Step 1: Prep the Oven and Pans
Start by preheating your oven to a low 225°F and line two baking sheets with parchment paper. This low temperature is key to drying out your meringues gently, so they stay crisp without browning.
Step 2: Whip the Egg Whites
In a clean, dry bowl, beat the egg whites on medium speed until foamy—that lovely bubbly texture signals you’re off to a good start. Add the cream of tartar now to stabilize them and continue beating until soft peaks form. This helps the sugar dissolve better in the next step, ensuring your meringues stay smooth and glossy.
Step 3: Add Sugar Gradually
Add the granulated sugar one tablespoon at a time, boosting your mixer to high speed. This slow addition allows each bit to fully dissolve, giving you the stiff, shiny peaks that define a perfect meringue. A simple tip: test the mixture by rubbing a bit between your fingers—no grit means you’re good to go.
Step 4: Flavor the Meringue
Gently fold in the vanilla and lemon extracts, which bring those classic sherbet notes to life. Mixing at this stage ensures the flavors are evenly distributed without deflating your meringue base.
Step 5: Color and Pipe Your Meringues
Divide the meringue evenly into three separate bowls. Tint each with pink, orange, and green gel food coloring, using just enough for vibrant color but not so much to affect texture. Spoon each hue side by side into a piping bag fitted with a large star tip—this technique creates the beautiful rainbow swirls. Then pipe small, whimsical swirls onto your parchment-lined sheets. For an extra pop, sprinkle with rainbow sanding sugar.
Step 6: Bake and Cool
Bake at 225°F for 1 hour. After baking, don’t rush—turn off the oven and let the meringues cool completely inside for another hour. This slow drying process ensures your Rainbow Sherbet Meringues are crisp on the outside and wonderfully light inside.
How to Serve Rainbow Sherbet Meringues Recipe

Garnishes
Sprinkle a little extra sanding sugar or even a tiny dusting of edible glitter just before serving to amplify their festive charm. You can also pair them with fresh berries or edible flowers for a stunning visual contrast and extra flavor dimension.
Side Dishes
These meringues shine best as a standalone treat or alongside a scoop of creamy vanilla ice cream, making a light and refreshing dessert that echoes their sherbet inspiration. They also pair beautifully with a tangy citrus salad or a dollop of whipped cream mixed with fresh herbs for a sophisticated twist.
Creative Ways to Present
Try arranging the Rainbow Sherbet Meringues Recipe on a glass platter in a rainbow rainbow arc to highlight their colors. For a birthday or party, serve them in individual mini dessert cups layered with whipped cream and fresh fruit for an elegant presentation. They also make adorable garnishes for festive cocktails or mocktails.
Make Ahead and Storage
Storing Leftovers
Store leftover meringues in an airtight container at room temperature to maintain their crispness. Avoid refrigerating them as moisture can cause them to soften and lose their delicate texture.
Freezing
You can freeze meringues by placing them in a single layer on a baking sheet until solid, then transferring them to a freezer-safe bag or container. When ready to eat, thaw at room temperature to preserve their crisp lightness.
Reheating
Since meringues are best enjoyed fresh and crisp, reheating is not typically recommended. However, if they feel a bit soft, a quick 5-10 minute stint in a low oven (around 200°F) can help restore some crunch, just watch carefully to prevent browning.
FAQs
Can I use regular liquid food coloring instead of gel?
Gel food coloring is preferred because it provides vibrant color without thinning the meringue mixture. Using liquid food coloring can affect the texture and may prevent stiff peaks from forming properly.
What if my egg whites don’t whip up properly?
Make sure no trace of yolk is in your whites and use a clean, grease-free bowl. Room temperature egg whites whip better and always add cream of tartar or an acid to stabilize the peaks.
Can these meringues be made without the lemon extract?
Absolutely! The lemon extract adds a subtle tang typical of sherbet but leaving it out won’t affect the structure — your meringues will still be deliciously sweet and colorful.
How long do rainbow sherbet meringues keep?
Stored properly in an airtight container, they can stay fresh and crisp for up to two weeks. However, they’re best enjoyed within the first few days for optimal texture.
Is this recipe gluten-free?
Yes, Rainbow Sherbet Meringues Recipe is naturally gluten-free, making it a fantastic treat for those with gluten sensitivities or anyone looking for a light, allergen-friendly dessert.
Final Thoughts
There is something truly joyful about making and sharing this Rainbow Sherbet Meringues Recipe. It’s not just a cookie; it’s a celebration in pastel colors and airy sweetness that captures the spirit of sherbet in a fun, bite-sized form. I can’t wait for you to try it and see how these charming meringues brighten your dessert table and put a smile on everyone’s face!
Print
Rainbow Sherbet Meringues Recipe
- Prep Time: 20 minutes
- Cook Time: 1 hour
- Total Time: 2 hours 20 minutes
- Yield: 24 meringues
- Category: Dessert
- Method: Baking
- Cuisine: American
- Diet: Gluten Free
Description
Rainbow Sherbet Meringues are delicate, colorful cookies made from whipped egg whites and sugar, tinted in vibrant pink, orange, and green to mimic the hues of rainbow sherbet. These light, crisp meringues are flavored with vanilla and lemon extracts for a subtle, refreshing taste. Perfect as a bright, visually appealing dessert or a festive treat, they require simple ingredients and baking to achieve their airy texture.
Ingredients
Egg Whites Mixture
- 4 large egg whites at room temperature
- 1 cup granulated sugar
- 1/4 teaspoon cream of tartar
- 1/2 teaspoon pure vanilla extract
- 1/2 teaspoon lemon extract
Coloring and Garnish
- Gel food coloring: pink, orange, and green
- 2 tablespoons rainbow sanding sugar or sprinkles for garnish
Instructions
- Preheat and prepare pans: Preheat your oven to 225°F (107°C). Line two baking sheets with parchment paper to prevent the meringues from sticking during baking.
- Whip egg whites: In a clean, dry mixing bowl, beat the 4 egg whites on medium speed until they become foamy. This initial step incorporates air, critical for a light texture.
- Add cream of tartar and beat to soft peaks: Add 1/4 teaspoon cream of tartar to stabilize the egg whites. Continue beating until soft peaks form, meaning the whites hold their shape but the peaks slump when the beaters are lifted.
- Gradually add sugar: Begin adding the 1 cup granulated sugar one tablespoon at a time while beating on high speed. This slow addition ensures sugar dissolves properly and helps form stiff, glossy peaks.
- Beat to stiff peaks: Continue beating until stiff, glossy peaks form and the sugar is fully dissolved, indicating the meringue is smooth and shiny without graininess.
- Incorporate extracts: Gently fold in 1/2 teaspoon each of pure vanilla and lemon extracts to flavor the meringue mixture without losing volume.
- Divide and color: Divide the meringue evenly into three separate bowls. Tint each with pink, orange, and green gel food coloring respectively, mixing gently to maintain airiness and vibrant colors.
- Pipe meringues: Spoon each colored meringue side by side into a piping bag fitted with a large star tip to create a swirling rainbow effect. Pipe small swirls onto the parchment-lined baking sheets.
- Add garnish: Lightly sprinkle 2 tablespoons of rainbow sanding sugar or sprinkles on top of the piped meringues to add sparkle and texture.
- Bake meringues: Bake in the preheated oven for 1 hour at 225°F to dry out the meringues gently and maintain their shape and crispness.
- Cool in oven: After baking, turn off the oven and leave the meringues inside for an additional hour to cool and dry out completely without cracking.
- Store properly: Once cooled, transfer the meringues to an airtight container and store at room temperature to keep them crisp and fresh until serving.
Notes
- Ensure no egg yolk contaminates the egg whites, as even a small amount can prevent proper whipping.
- Humidity can negatively affect meringue texture; aim to make meringues on dry days for best results.
- Store meringues in a sealed container to preserve crispness and prevent them from absorbing moisture.
- Allowing meringues to cool and dry in the oven after baking helps achieve the perfect airy, crunchy texture.
