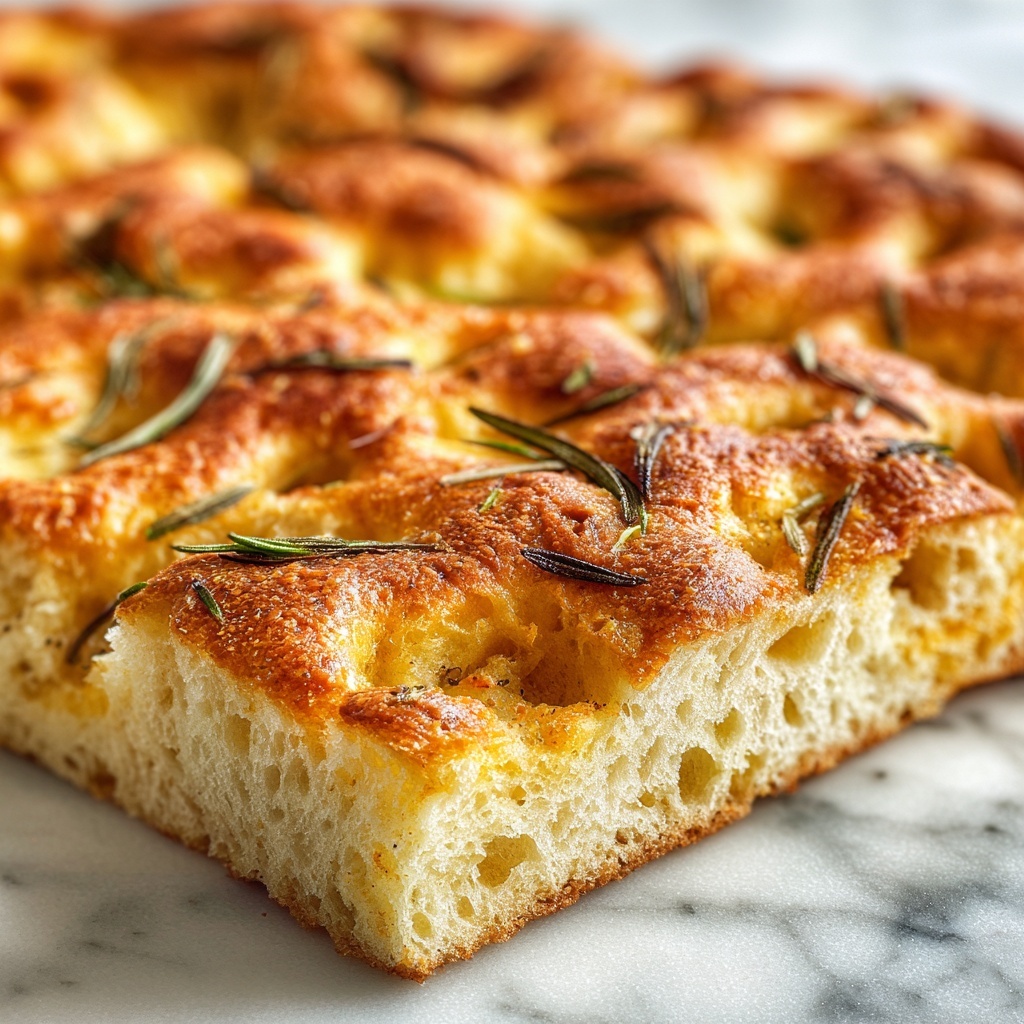
If you have ever craved the perfect rustic loaf that feels as cozy as a warm hug, then this Rustic No Knead Rosemary Garlic Bread Recipe is about to become your best friend in the kitchen. It’s a beautifully simple bread bursting with fragrant rosemary and garlic, that requires almost no effort but delivers incredible flavor and a crust that’s satisfyingly crisp. Whether you’re a seasoned baker or someone who just wants a foolproof way to fill your home with the aroma of fresh bread, this recipe promises a warm, crusty, and herbaceous delight you’ll want to share again and again.
Ingredients You’ll Need
At first glance, the ingredients list might look humble, but each component plays a vital role in creating the magic behind the Rustic No Knead Rosemary Garlic Bread Recipe. They bring together the perfect balance of flavor, texture, and that gorgeous golden crust.
- 3 cups all-purpose flour: The foundation of your bread, ensuring structure and a tender crumb.
- 3 cloves garlic, minced: Infuses the dough with delicious, subtle garlic warmth that permeates every bite.
- 1 tablespoon finely chopped fresh rosemary: Adds that earthy, aromatic herbaceous note that makes this bread unforgettable.
- 1 ¼ teaspoons kosher salt: Brings out flavor and balances sweetness while enhancing the dough’s texture.
- ¾ teaspoon freshly ground black pepper: A touch of spice to complement the garlic and rosemary perfectly.
- ½ teaspoon instant yeast: The magic leavening agent that lets your bread rise beautifully without any kneading required.
- 1 ½ cups water, at room temperature: Hydrates the dough to the perfect wet, sticky consistency essential for this no-knead style.
- 2 tablespoons cornmeal: Used to dust the skillet, it prevents sticking and adds a slight crunch to the base crust.
How to Make Rustic No Knead Rosemary Garlic Bread Recipe
Step 1: Mix Your Ingredients
Start by combining the all-purpose flour, minced garlic, fresh rosemary, kosher salt, black pepper, and instant yeast in a large bowl. These dry ingredients form the backbone of your dough’s flavor. Next, pour in the room temperature water and mix everything together using either a wooden spoon or your hand until a wet, sticky dough forms. This usually takes about 30 seconds—no tools necessary and no mess of flour-covered counters!
Step 2: Let the Dough Rise Gently
Cover your bowl tightly with plastic wrap and set it aside at room temperature. The magic unfolds here, as the dough slowly bubbles and ferments over 18 to 24 hours. This long fermentation creates complex flavors and gives the bread that wonderful chewy texture, all without you having to knead a thing.
Step 3: Prepare Your Baking Vessel
Lightly oil a 10-inch cast iron skillet or coat it with nonstick spray, then sprinkle the bottom with cornmeal. This step ensures your bread won’t stick and will develop a deliciously crunchy bottom crust. The cornmeal adds just the right texture to make every bite memorable.
Step 4: Shape the Dough
Turn your risen dough onto a lightly floured surface and gently shape it into a round. Remember, this rustic bread is all about a natural, imperfect shape that gives it charm. Place the dough into your prepared skillet for its final rise.
Step 5: Final Proof
Cover the skillet with a clean kitchen towel and let the dough stand at room temperature for about 2 hours until it doubles in size and feels soft to the touch but doesn’t spring back when poked. This last rise primes the dough for the oven, ensuring a light interior crumb alongside that crisp crust.
Step 6: Bake to Perfection
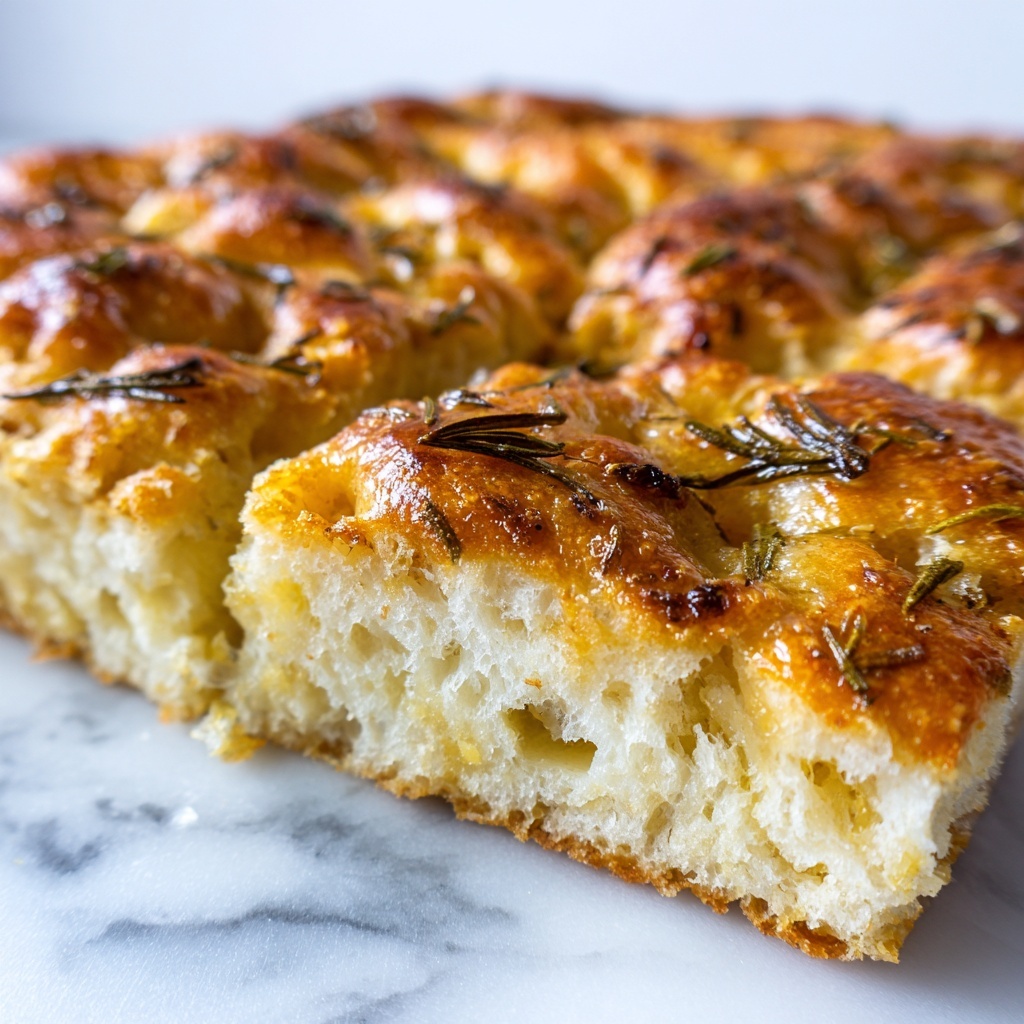
Preheat your oven to 450°F (230°C), then place the skillet right in and bake the bread until it’s golden brown, which usually takes 30 to 40 minutes. The combination of high heat and the cast iron skillet creates a beautiful crust that’s crunchy on the outside with an irresistibly tender center.
How to Serve Rustic No Knead Rosemary Garlic Bread Recipe

Garnishes
The beauty of this rustic loaf is that it stands perfectly on its own, but you can elevate it with simple garnishes. Try drizzling a little good quality olive oil or rubbing the crust with a peeled garlic clove for an extra pop of flavor. Sprinkling flaky sea salt on top right after baking adds a delightful burst of texture.
Side Dishes
This Rustic No Knead Rosemary Garlic Bread Recipe shines alongside hearty soups, vibrant salads, or a rich stew. Think creamy tomato basil soup or a fresh arugula and beet salad—the bread’s robust flavor and crispy crust make it a natural companion to almost any meal.
Creative Ways to Present
For a gorgeous presentation at your next gathering, slice the bread into thick wedges and serve on a wooden board with an assortment of flavored butters, tapenades, or cheeses. The rosemary and garlic flavor means it pairs beautifully with aged cheddar or a soft brie. You can also transform it into a bruschetta base by topping it with diced tomatoes, garlic, and olive oil for a crowd-pleasing appetizer.
Make Ahead and Storage
Storing Leftovers
If you find yourself with leftovers, wrap your bread tightly in plastic wrap or a clean kitchen towel and store it at room temperature. It will stay fresh for about 2 to 3 days. This way, you keep that lovely crust crisp and the crumb soft.
Freezing
For longer storage, this Rustic No Knead Rosemary Garlic Bread Recipe freezes wonderfully. Slice the loaf first, then layer the slices between parchment paper inside a freezer bag. When you’re ready, toast the slices straight from the freezer or let them thaw at room temperature.
Reheating
To revive your bread’s freshly baked crust, reheat it in a 350°F (175°C) oven for about 10 minutes. This will bring back the crispness and warm the crumb, making it taste like it just came out of the oven.
FAQs
Do I really not need to knead the dough?
Absolutely! The magic of this Rustic No Knead Rosemary Garlic Bread Recipe lies in the long fermentation period, which develops gluten slowly without any kneading, saving you effort and mess.
Can I substitute fresh rosemary with dried?
You can, but fresh rosemary lends a brighter, more fragrant flavor. If you use dried, reduce the amount as it’s more concentrated, and remember to crush it slightly to release the oils.
How important is the cast iron skillet?
A cast iron skillet gives this bread its trademark crust and even heat distribution, but if you don’t have one, a heavy oven-safe pot or Dutch oven can work as a substitute.
What if I want a more garlicky flavor?
Go for it! You can add more minced garlic in the dough or brush the crust with garlic-infused olive oil after baking for a stronger garlic punch.
Can I add other herbs or flavors?
Definitely! While rosemary and garlic are classic, feel free to experiment with thyme, oregano, or even a sprinkle of Parmesan to tailor this Rustic No Knead Rosemary Garlic Bread Recipe to your taste.
Final Thoughts
There is something truly special about pulling a golden, fragrant loaf of this Rustic No Knead Rosemary Garlic Bread Recipe from the oven—it smells incredible, tastes even better, and requires barely any effort. It’s a recipe that welcomes both beginner and experienced bakers to create a rustic masterpiece worthy of the Sunday table or any day you want something comforting and delicious. Trust me, once you try it, this bread will become your go-to for sharing love in the form of freshly baked goodness.
Print
Rustic No Knead Rosemary Garlic Bread Recipe
- Prep Time: 10 minutes
- Cook Time: 35 minutes
- Total Time: 19 hours 45 minutes
- Yield: 8 servings
- Category: Bread
- Method: Baking
- Cuisine: American
Description
This Rustic No Knead Rosemary Garlic Bread is a simple yet flavorful artisan loaf that requires minimal hands-on time. Infused with fresh rosemary and garlic, it offers a fragrant and delicious crusty bread perfect for any meal. The recipe uses a no-knead method with a long fermentation, baking the dough in a cast iron skillet for a perfect crust and tender crumb.
Ingredients
Dry Ingredients
- 3 cups all-purpose flour
- 1 ¼ teaspoons kosher salt
- ¾ teaspoon freshly ground black pepper
- ½ teaspoon instant yeast
Fresh Ingredients
- 3 cloves garlic, minced
- 1 tablespoon finely chopped fresh rosemary (or more, to taste)
Wet Ingredients
- 1 ½ cups water, at room temperature
For Baking
- 2 tablespoons cornmeal
Instructions
- Combine Ingredients: In a large bowl, mix together all-purpose flour, minced garlic, chopped fresh rosemary, kosher salt, freshly ground black pepper, and instant yeast until evenly distributed.
- Add Water and Form Dough: Pour in the room temperature water and stir with a wooden spoon or your hand until a wet, sticky dough forms, about 30 seconds of mixing.
- First Rise: Cover the bowl tightly with plastic wrap and let the dough rest at room temperature for 18 to 24 hours, until the surface is dotted with bubbles, indicating fermentation.
- Prepare Skillet: Lightly oil a 10-inch cast iron skillet or spray it with nonstick spray, then sprinkle the bottom with cornmeal to prevent sticking and add texture.
- Shape Dough: Turn the dough onto a lightly floured surface and gently shape it into a round loaf without deflating the air bubbles. Place this dough round into the prepared skillet.
- Second Rise: Cover the dough with a clean dishtowel and allow it to rise at room temperature for about 2 hours, or until it has doubled in size and does not spring back when poked.
- Bake Bread: Preheat your oven to 450°F (230°C). Place the skillet with dough directly into the oven and bake for 30 to 40 minutes, or until the bread is golden brown and crusty. Remove from oven and let cool slightly before slicing.
Notes
- The long fermentation time (18-24 hours) develops flavor and texture, so plan ahead.
- Use a cast iron skillet for best crust development; if unavailable, a heavy oven-safe skillet works as well.
- Make sure the water is at room temperature to activate yeast properly without killing it.
- You can increase or adjust rosemary and garlic amounts according to your preference.
- Allow the bread to cool completely before slicing to avoid a gummy texture inside.


